 Supplies
1. white yarn ( I prefer using wool)
2. pink yarn (optional)
3. scissors
4. tacky glue
5. needle and thread
6. small black beads for eyes
7. pink or white felt for ears ( I use wool felt)
8. red crayon and small piece of knit fabric
9. white cotton pipe cleaner
10. pink bead (optional)
11. Tiny bit of pink wool ( optional)
12. Clover pom pom makers 1 3/8″ and 1 5/8″ (optional)
First we need to make two white pom poms, one in each size. If you do not have the Clover pom pom makers you can use cardboard templates cut to the same diameter. Make sure your pom poms are nice and full, then tie them off tightly with strong thread.

Next we need to trim and shape them. The smaller pom pom will become the head. While holding the string used to tie the pom pom together, carefully trim until it is shaped like a tear drop. Then take the larger pom pom and trim until it is egg shaped.

Now it’s time for the ears. Take your piece of knit fabric and rub the red crayon on it a few times. Cut 2 ears out of felt, and take the knit fabric and rub gently to blush the inside of the ear. Using a needle and thread, place a few stitches in the bottom of the ear as pictured above.

Using the tacky glue, attach the ears to the head. Be sure to part the yarn, so that the ears are set in, and not just resting on the surface of the head. Now glue the black glass beads on for eyes, being sure to set them in as with the ears. Next we need to make the nose. You can use a pink bead, shown in the photo on the right.

You can also take a small bit of pink wool and roll it into a ball with your fingers, it only takes a little while for the wool to mat together. You can also make a nose using a piece of pink yarn. Simply tie the yarn into a triple knot, trim the ends and glue onto the head. Be sure to let the glue dry before moving on to the next step.
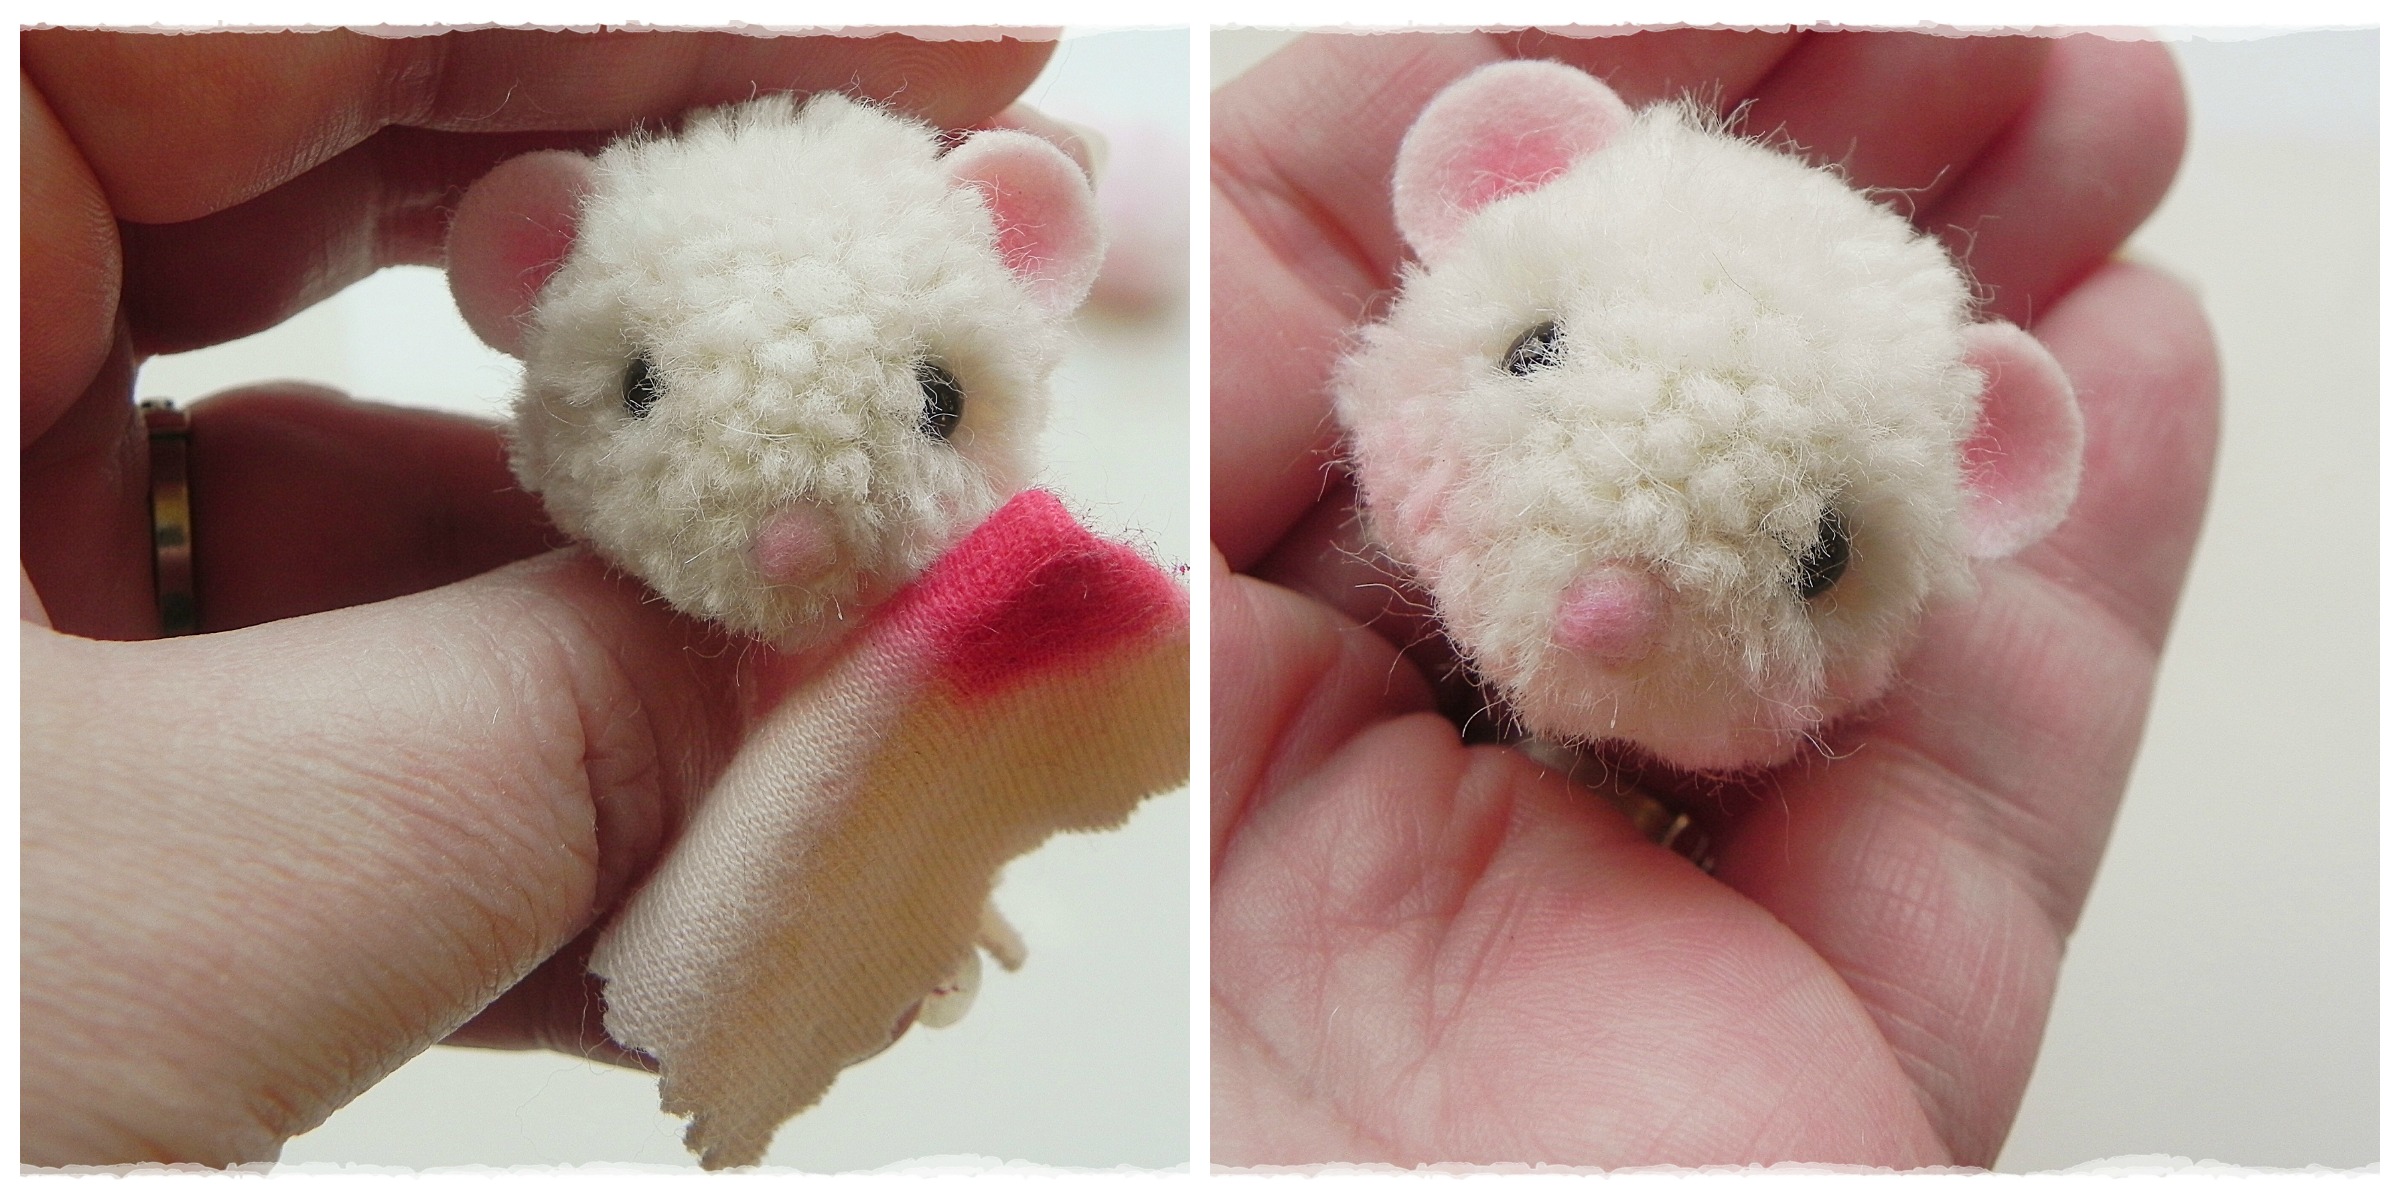
Take the piece of knit fabric and gently rub on the cheeks of your mouse to add a little blush.

Time to make the arms, legs, and tail.
Cut your pipe cleaner into 5 pieces. 3 pieces should be about 2 3/4″ long and 2 pieces should be about 1 3/4″ long. Fold 2 of the longer pieces in half, these will become the legs. Leave the third long piece as is, this will be our tail. Turn in the ends of the remaining 2 pieces, as shown in the photo above. These are our arms.

Time to attach the limbs and tail. Use the tacky glue to glue both legs in place, be sure to use enough to form a strong bond. Attach arms in the same manner. Set aside until glue is dry.

Once the glue for the arms and legs has dried, it’s time to attach the tail. Wait for the glue to dry and bend the feet at the ankles as shown.

Yay, we are almost done! Glue the head onto the top of the body, and let dry. Yippee, you have a new mousy friend!
With some gentle adjustments, your mouse will stand on it’s own.

Is your mouse a boy or a girl? Do they need an acorn cap beret and a scarf, or maybe a pretty dress? Use your imagination, and have fun!
I hope you have enjoyed this tutorial. Please feel free to send me a message, if you have any questions. I would also love to see photos of finished mice!
This tutorial is for personal use only and may not be sold.

How cute! Thank you so very much for sharing this! 🙂
Reblogged this on Rochester Artisans and commented:
Artist Amy Brand shows how to make your own sweetly adorable Pom Pom Mouse in this excellent tutorial!
Love it! My husband is going to have to call an exterminator this weekend because these little mice are going to be all over the house. 🙂
🙂 I want pictures!!
adorable! thanks for sharing with us.
This is the most adorable mouse and loved the tutorial! Thank you
Adorable!
Pingback: Perfectly Placed Pompoms | Deramores
Love your pom pom mice! So creative & fun. Thanks for sharing this. 🙂
You are welcome! If you make any, I would love to see the results 🙂
Thank you!! This is the most beautiful of the tutorials I have ever found. I’m going now to make my own little mouse. You are great!!!
Pingback: Sommernachwehen |
Hi just saw your tutorial and I’ll certainly be making some of these when my Granddaughters come for a sleepover. They’re beautiful and you’ve made it look so easy but I doubt that it is. Thank you. XX